


Every once in a while, I find myself going through my closet and deciding which clothes I want to sell or donate. As I was doing this months ago, I came across a plain navy blue T-shirt. At the time, I thought it was something I’d never wear and almost immediately piled it in with my other clothes in the discard pile.
Then, I gave it a second thought and realized that its simplicity gave it potential. I decided to keep the top and thought about what exactly I wanted to do with it. Eventually, I knew what the next step was going to be: I was going to cut the back out into a skull!
I had seen it many times before online, and I thought that just getting rid of my shirt could potentially be a big waste.
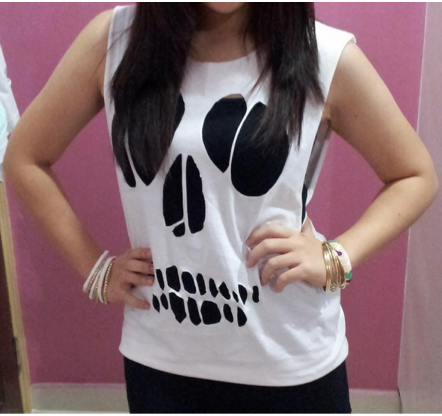
So what was otherwise just a regular shirt eventually turned into this: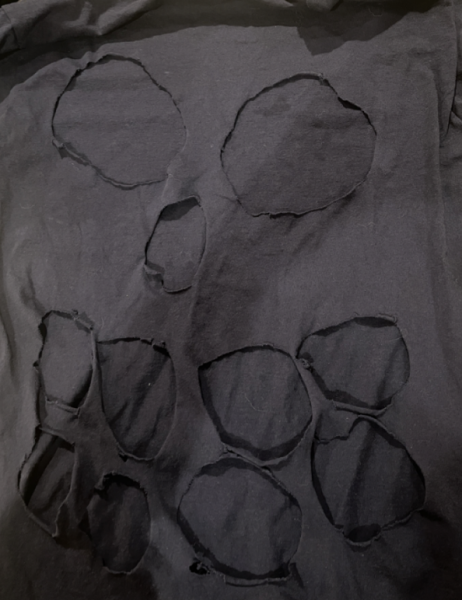
It wasn’t my best work, but I was proud for my first time and impressed with myself that I didn’t give up on it so easily.
Since that moment, I’ve cut skulls into my shirts many times and improved multiple tops in my wardrobe. Everyone has clothes that they don’t wear, and there’s always a chance to repurpose untouched clothing.
Spicing up your closet doesn’t have to be expensive: DIY-ing and adding your own twist on what you already own is a great, cheap way to do it! Today, I will be giving a step-by-step tutorial on how to cut a skull on the back of your shirt for anyone who wants to add an edgy twist to a top that they have.
First, you’ll have to gather your supplies. These would include: scissors, a dark shirt (preferably one with a tougher, tight-thread fabric instead of soft and silky so that it’s easier to draw and cut on it), a white colored pencil.
Now that you have everything set up, take the pencil and draw two big circle-adjacent shapes with two lines close to each other cutting through the middle, a small triangle below the middle of them, then tiny squares below them following an upturning, smiling shape.
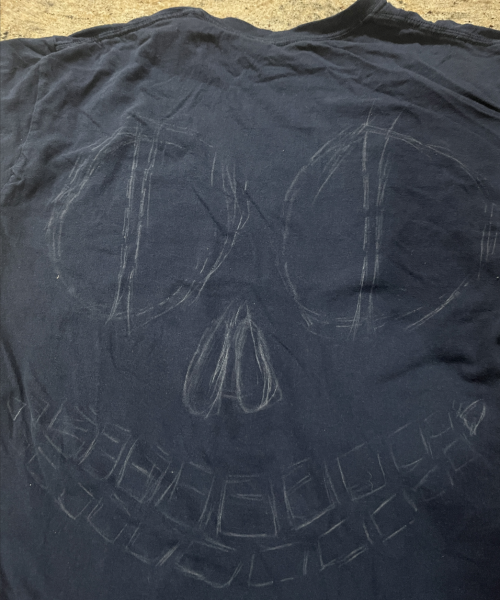
Note: You don’t have to follow the directions on the shapes exactly like this. You can make the eyes stars instead of circles, the skull frowning instead of smiling, etc. It all depends on your preference, and how you want your shirt to look.
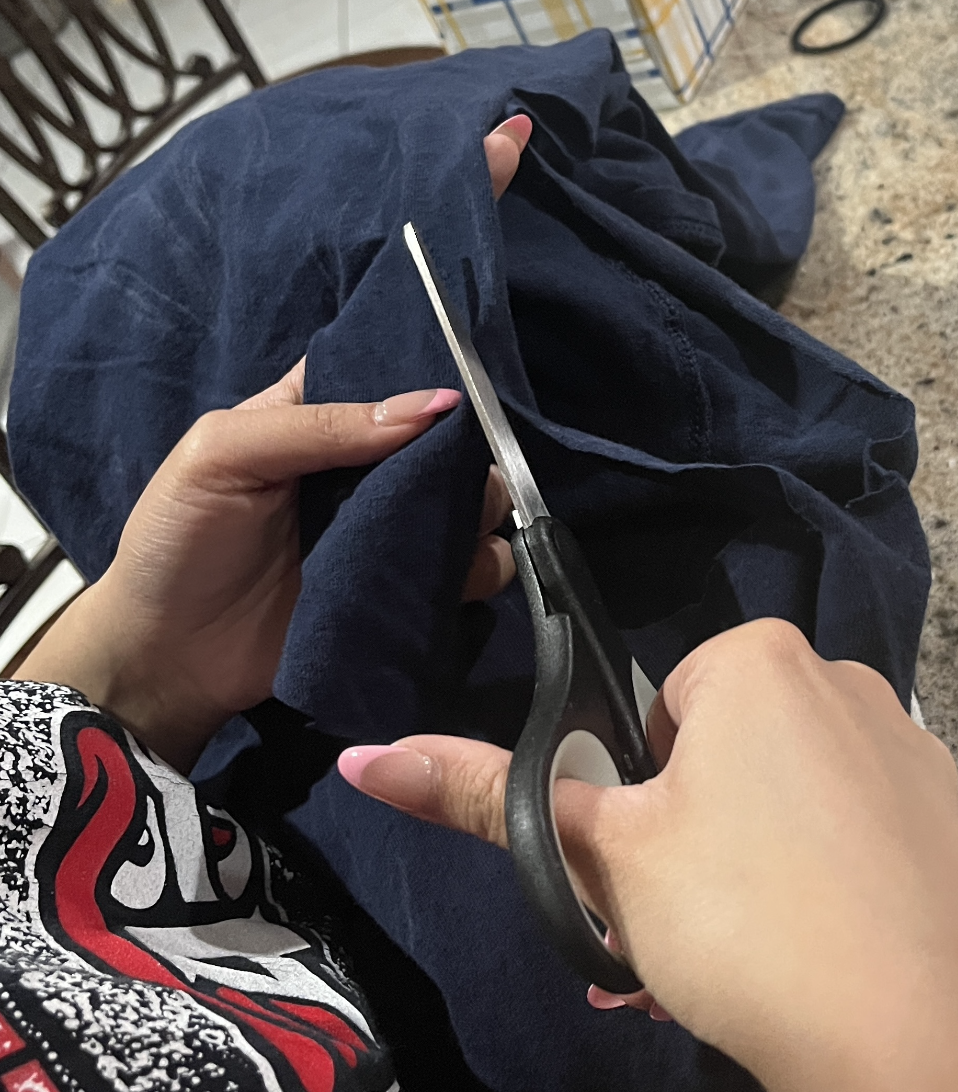
Now that we have our lines, the next step is to cut out the shapes you made. Be cautious and make sure that you don’t cut onto the front of the shirt; keep all the holes on the back. You don’t have to be exact with your cuts; messiness is completely fine and could even enhance the look of your top. After you’re done with this step, you should have your finished skull shirt ready to wear!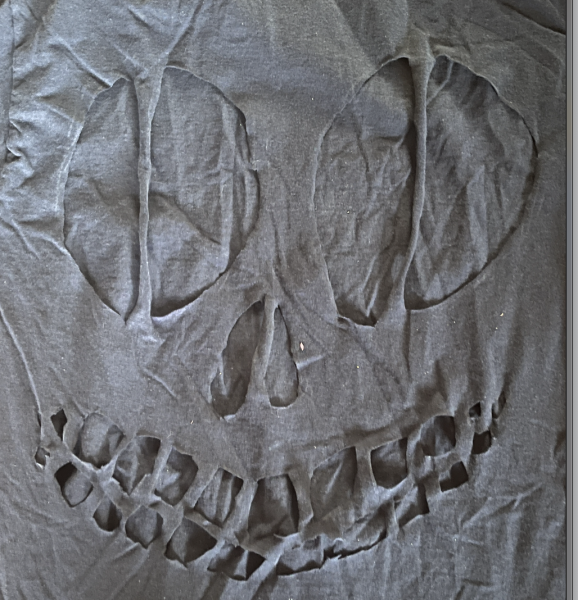
Once it’s yours, you can style it any way your heart desires. But, if you need some ideas to get you started… You can flip it to the front with a different colored shirt underneath!
 Or, you could wear a baggy fitted skull shirt with the cut out on the back over a tank top to give it a hooded eye look.
There are so many things you can do to clothing before getting rid of them. Think twice… A top that you don’t even think about could easily become one of your favorites with just a few personal touches.