


Even though the weather’s getting consistently nice, and the spring semester is finally over, many students still find themselves staying inside for the most part… I’m totally guilty of this.
Now, that summer is nearly upon us, it’s good to find some fun things to do! Transferring potted flowers
to the soil outside is a nice activity to do either on your own or with family and/or friends. It’s also a good way to spice up your front yard and a cool new skill to learn.
I will first talk about the supplies you will need, then the easy steps you’ll have to follow to achieve this task.
For this endeavor, you will need soil, a shovel, gloves, a potted flower and a watering can. A wheelbarrow isn’t a requirement, but it would make transferring these items a lot easier.
Now that we have everything set up, find a spot outside and dig a hole into the ground with your shovel. When picking a location, consider the general climate of the area and the condition of the soil.
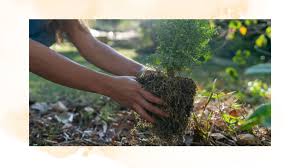
Then, take the plant out of the pot and squeeze the bottom dirt part slightly to loosen up the roots. This makes it so that the roots don’t strangle the plant later on, allowing it to take in more nutrients and water and to spread out in the soil.
After this, place the dirt section of the plant into the hole in the ground, and cover it up with your soil so that only the plant is sticking out.
You’re done! Now, all you have to do is check up on it every now and again. Don’t forget to water it occasionally with your watering can, with flowers typically needing about 1 inch of water a week.